Gravity Forms is one of the most trusted form plugins for WordPress, and Elementor is where many of us design our pages. Putting the two together should be easy. In practice, people hit the same walls: there is no obvious Gravity Forms widget, the form looks nothing like the rest of the page, and the styling tricks you find online need custom CSS.
This guide shows you how to use Gravity Forms with Elementor the simple way. You will learn two methods to add a form, how to style it without code, and how to fix the problems that come up most often. The easy route uses the free Gravity Forms Styler widget from Bright Addons, but the general steps work with any setup.
What you need before you start
Make sure you have these ready:
- Gravity Forms installed and active. It is a premium plugin, so you need a licence from the Gravity Forms team.
- Elementor (the free version is enough for everything in this guide).
- At least one form built in Gravity Forms. Go to Forms > New Form, add your fields and save.
- For the no-code styling method: the free Bright Addons for Elementor plugin from WordPress.org.
One version note: the Gravity Forms Styler widget’s theme choice uses the form themes that arrived in Gravity Forms 2.7 (Basic and Orbital), so keep Gravity Forms on 2.7 or newer. Any current licence will be well past that.
Method 1: How to add a Gravity Form to Elementor with a shortcode
This method works on any site, with or without addons.
- In WordPress, go to Forms and note the ID of the form you want (it shows in the forms list).
- Open your page with Edit with Elementor.
- Search the widget panel for Shortcode and drag it into your section.
- Paste the Gravity Forms shortcode, for example
[gravityform id="1" title="false" description="false" ajax="true"]. Change the ID to match your form. - Click Update and preview the page.
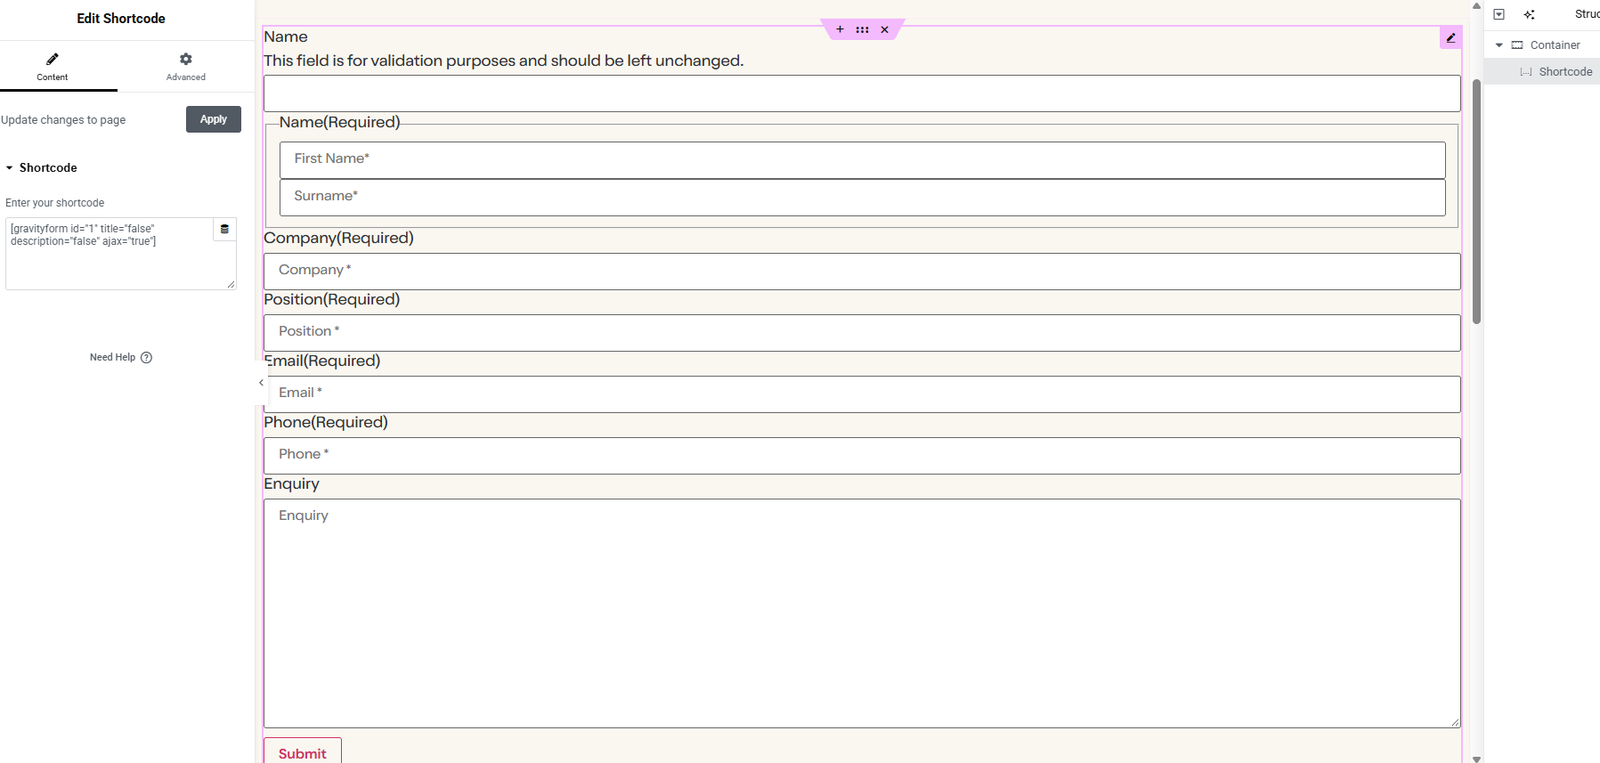
The title and description parts hide or show the form’s own title and description, and ajax="true" submits the form without reloading the page. This works fine, but there is a catch. The Shortcode widget has no style controls. To change colors, spacing or the button, you are left with the Gravity Forms theme settings or custom CSS.
Method 2: Style Gravity Forms in Elementor with a free widget
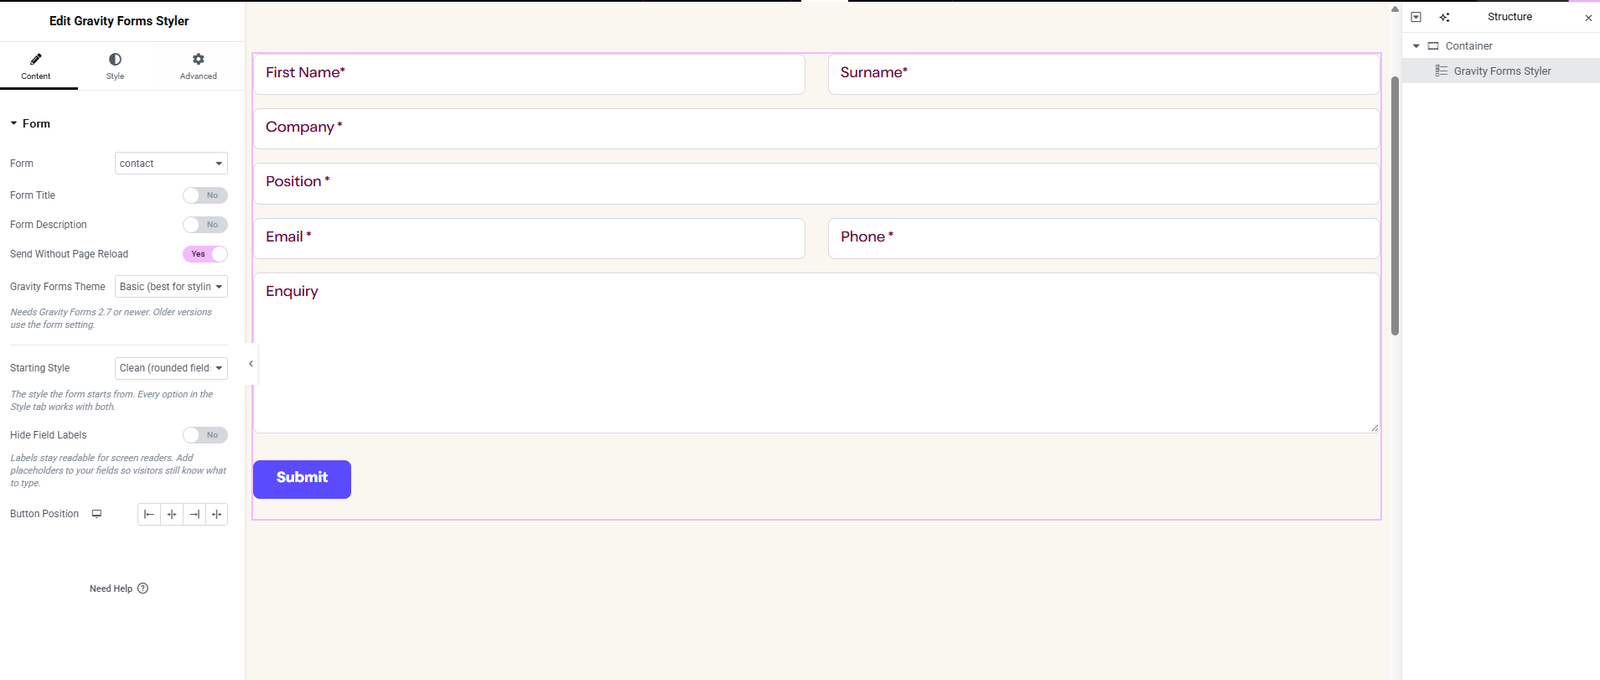
If you want to style Gravity Forms in Elementor visually, the Gravity Forms Styler widget (Free) from Bright Addons does the job. It has been part of the free plugin since version 1.3.0 and is one of 56 free widgets.
The widget picks a form from your Gravity Forms list, prints the form for you, and gives you Elementor controls to style it. All styles are scoped to that widget, so changing one form never breaks another form elsewhere on your site.
Here is how to set it up:
- Install and activate Bright Addons for Elementor from Plugins > Add New (search “Bright Addons”).
- Edit your page with Elementor and search the panel for Gravity Forms Styler.
- Drag the widget into place and choose your form from the dropdown.
- Pick a Starting Style. “Clean” (the default) gives you rounded fields and a bold button right away. “Form plugin style” keeps the look that Gravity Forms already gives the form, so you only tweak what you want.
- Choose the theme: Basic (the default), Orbital, or “use the form setting” if you already set a theme inside Gravity Forms.
- Turn the AJAX submit switch on if you want the form to send without a page reload.
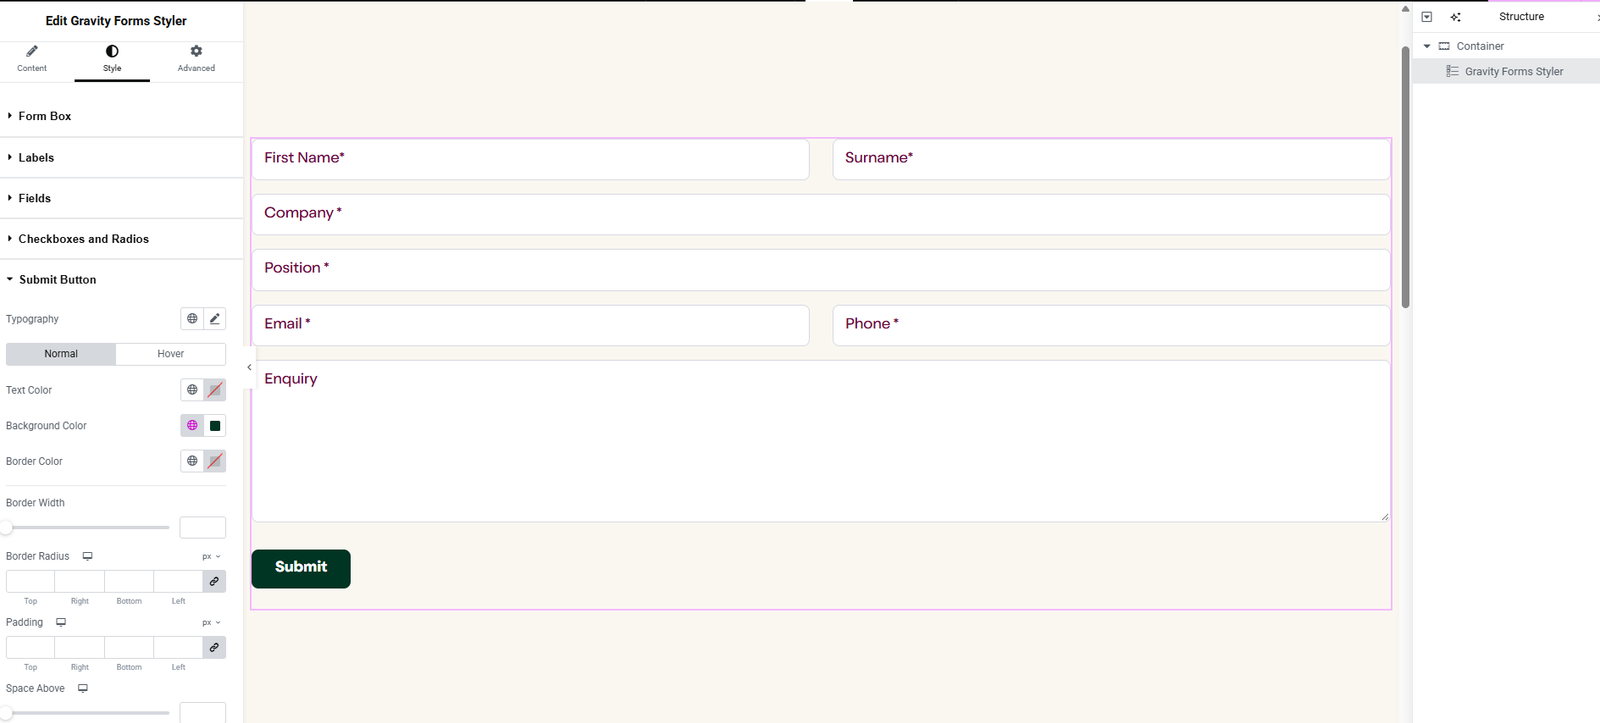
- Open the Style tab and design the form (next section).
The full option list is in the Gravity Forms Styler guide, and you can see the widget in action on the Gravity Forms Styler widget page.
Gravity Forms styling: what you can change without CSS

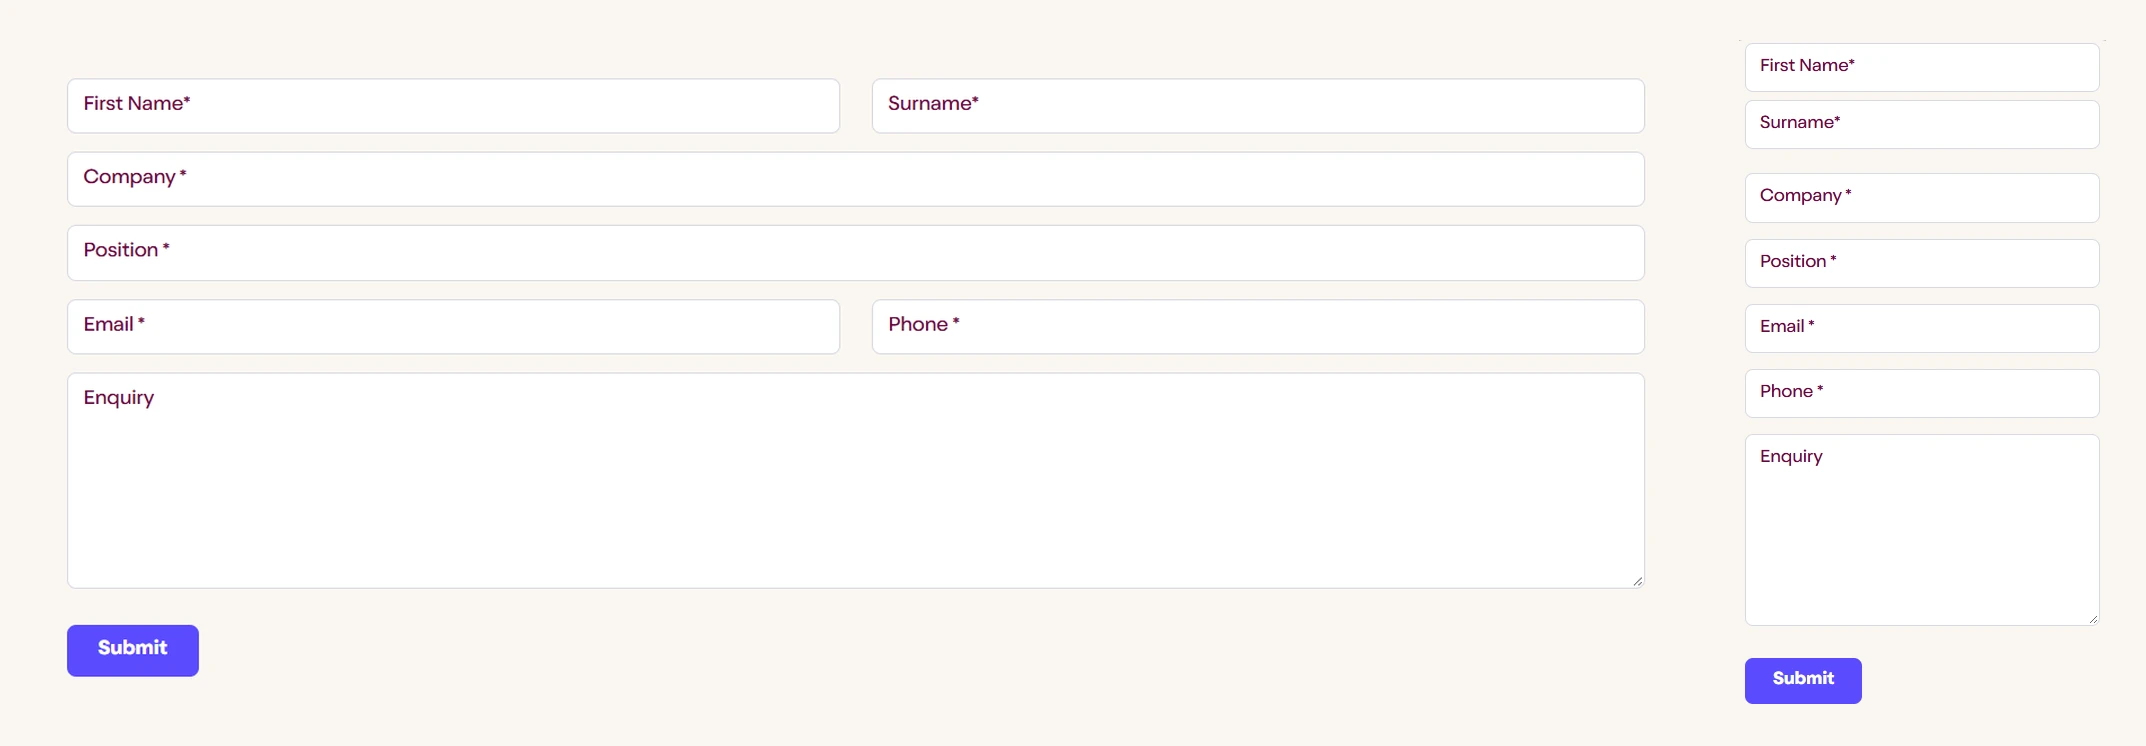
Good Gravity Forms styling is about matching the form to your brand, not making it flashy. With the Styler widget you can style each part of the form:
| Form part | What to adjust |
|---|---|
| Labels | Font, size, color and spacing |
| Fields | Background, border, corner radius, padding, text color |
| Focus state | Border and color when a visitor clicks into a field |
| Checkboxes and radios | Look and spacing of choice fields |
| Submit button | Colors, font, padding, border, corner radius |
| Errors | How validation messages look |
| Success message | The confirmation visitors see after sending |
A few design tips that make forms convert better:
- Use one accent color for the button and the focus state, the same one your other buttons use.
- Give fields enough padding. Tiny fields are hard to tap on phones.
- Keep labels above fields, not only as placeholders. Placeholders vanish when people type.
- Make errors easy to read. A red border plus a clear message beats a small red line.
- Check the success message. It is the last thing a visitor sees, so make it friendly and on brand.
Using other form plugins too? The free plugin also includes a WPForms Styler and a Fluent Forms Styler widget (both Free) that work the same way; the Fluent Forms Styler guide shows the steps.
Common problems and fixes

These are the issues people search for most when Gravity Forms and Elementor do not behave. Most have a quick fix.
1. The form does not show at all. Check the form ID in your shortcode or the form selected in the widget. Make sure the form is set to active in Gravity Forms, and that Gravity Forms itself is active. If you use the Styler widget and the form list is empty, Gravity Forms is not running.
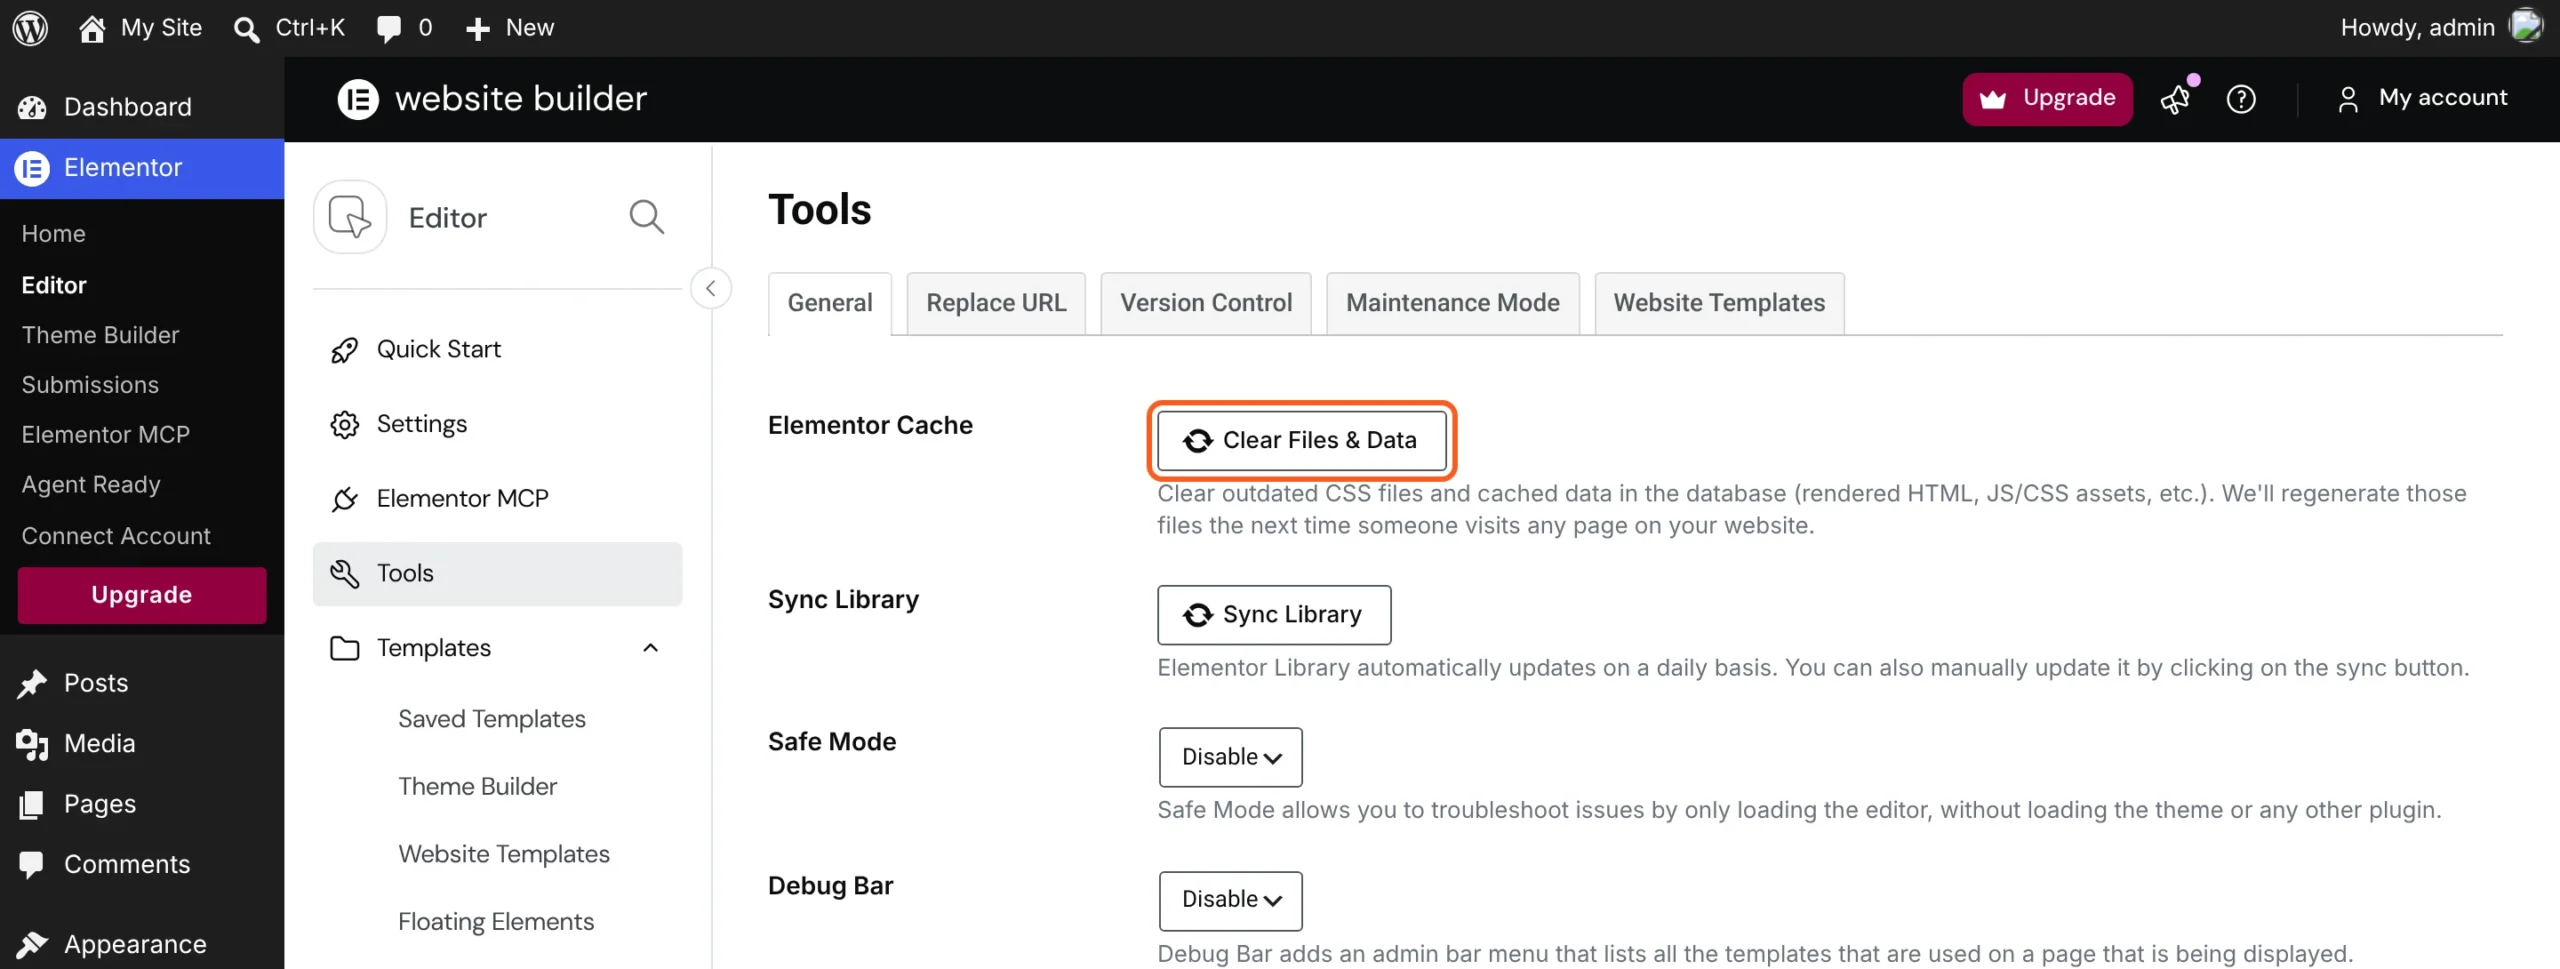
2. My styles do not change anything. Gravity Forms themes add their own styles. Try switching the widget’s Starting Style to “Clean”, or change the theme setting. Also clear any caching or optimization plugin cache, and regenerate Elementor’s CSS under Elementor > Tools.
3. The page reloads or jumps after submitting. Turn on AJAX submit (in the widget) or add ajax="true" to the shortcode. With AJAX, the confirmation shows in place without a full reload.
4. The form looks different in the editor and on the live site. Some form scripts only fully run on the front end. Always judge the final look in a preview or a private window, not only in the editor.
5. The button colors ignore my settings. Another plugin or your theme may be styling buttons globally. Check your theme’s button settings first, then look for a custom CSS snippet that targets all buttons.
6. Something broke after an update. Update Gravity Forms, Elementor and your addons together, ideally on a staging site first. If the editor misbehaves, our troubleshooting guide walks through the usual checks, such as plugin conflicts and caching.
Shortcode or widget: which should you use?
Both methods use the same Gravity Forms form, so you can switch any time without losing entries.
- Use the Shortcode widget if you only need the form to appear, you are happy with the Gravity Forms theme, or you already have custom CSS you like.
- Use the Gravity Forms Styler widget if you want Gravity Forms in Elementor to match your design, you hand sites over to clients who should not edit CSS, or you style many forms on many sites.
Conclusion
Adding Gravity Forms to Elementor takes a minute with a shortcode. Making it look like part of your site is where most people get stuck, and that is the gap a free styling widget closes. Pick your form, choose a starting style and a theme, then adjust labels, fields and the button in the Style tab. If something looks wrong, work through the fixes above before reaching for custom code.
FAQ
Does Elementor have a built-in Gravity Forms widget? Elementor does not include a dedicated Gravity Forms widget. You can add a form with the Shortcode widget, or use a styling widget such as the free Gravity Forms Styler from Bright Addons to add and design it in one place.
Is the Gravity Forms Styler widget free? Yes. It is part of the free Bright Addons for Elementor plugin on WordPress.org. You still need your own Gravity Forms licence, because Gravity Forms is a premium plugin.
Can I style Gravity Forms in Elementor without CSS? Yes. The Gravity Forms Styler widget gives you controls for labels, fields, focus states, checkboxes and radios, the submit button, errors and the success message.
Will styling one form change my other forms? No. The widget scopes its styles to that widget only, so each placed form can have its own design.
Try it on your site
The Gravity Forms Styler is free in Bright Addons for Elementor, alongside 55 other free widgets. Building with the block editor instead? The free Bright Addons Blocks Library has a Gravity Forms Styler block, and our store plugin Bright Addons for WooCommerce is free too. When you need more, Bright Addons Pro adds 98 Pro widgets (154 in total) from $10 a year during Black Friday, with the discount already applied and no code needed, until 30 November. Browse all widgets or see the pricing.